Creating Test Cases from Checks
A quick way to get started with Automated Testing is to create a Test Case from an existing Edit Check.
Open an Edit Check and click on the sidebar summary:
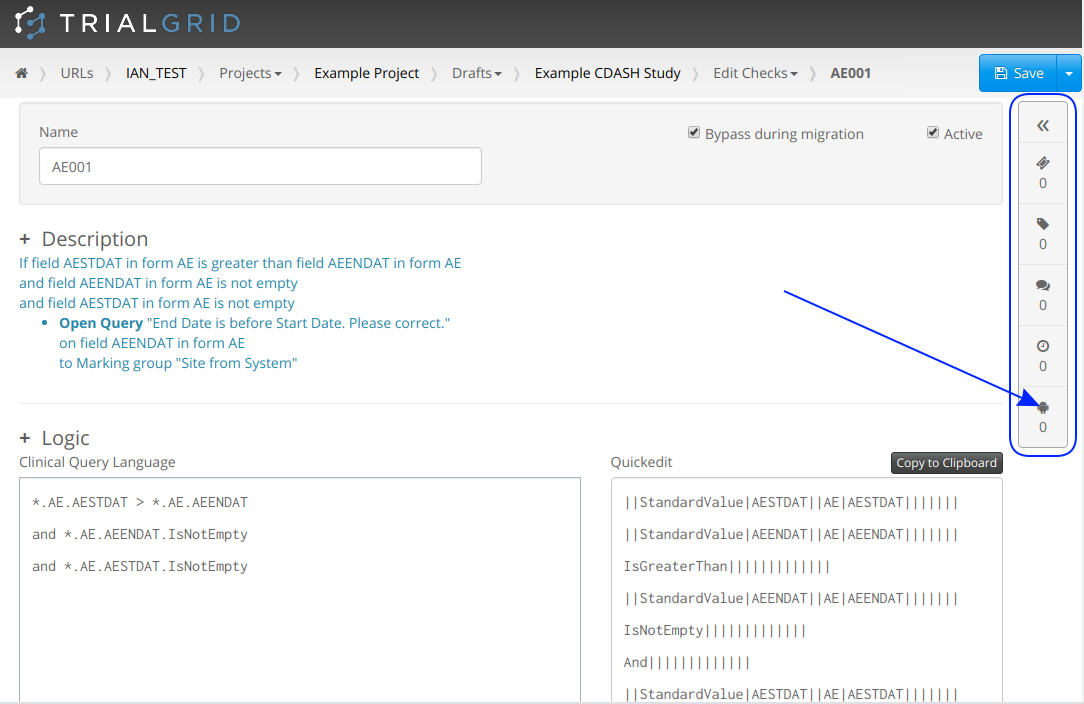
This will expand the sidebar. At the bottom of the sidebar is the Automated Tests section. Any linked Test Cases will be shown here. In this example we do not have a Test Case yet. Click the "Create New" button to create a new Test Case.

A new Test Case will be created and opened in an editor. The exact details of the Test Case will depend on the Edit Check it was generated for but it will have the following sections:
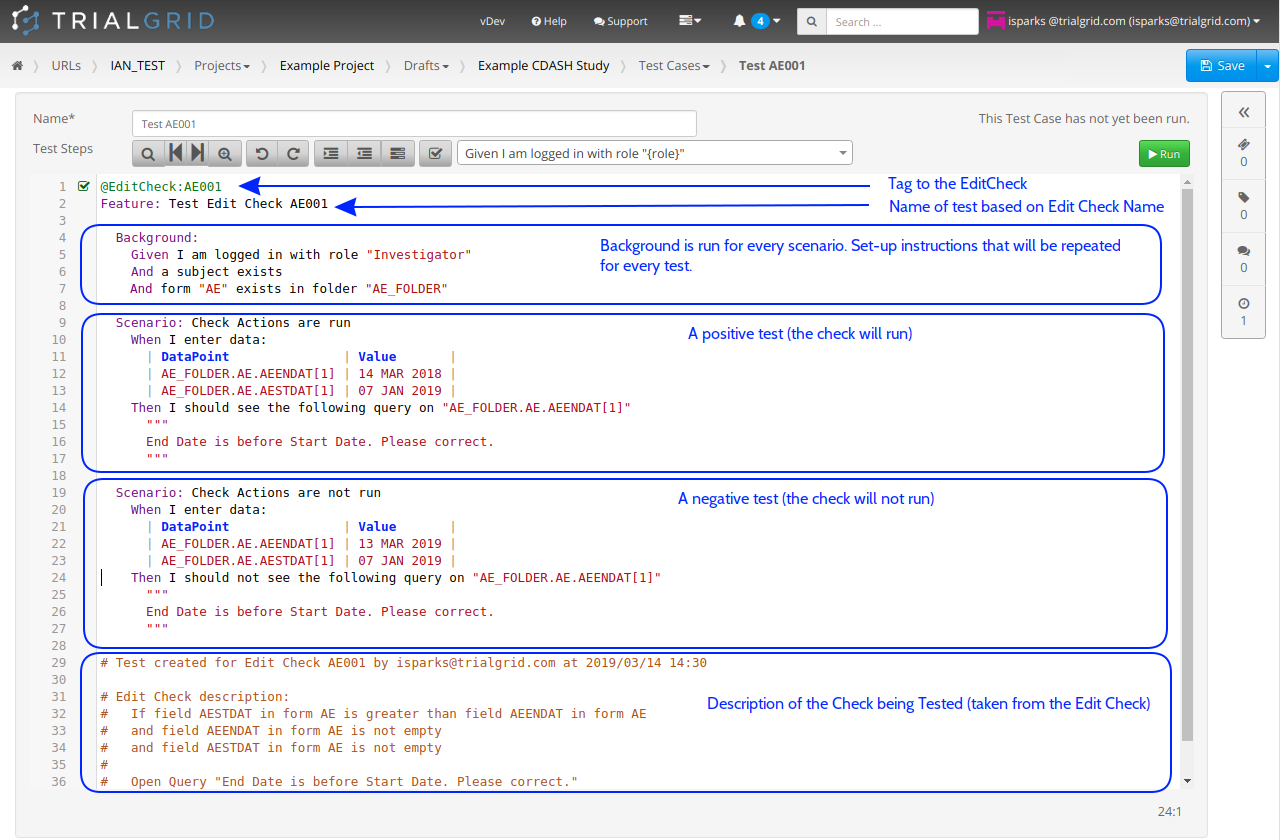
We will discuss the sections of the created check in turn:
Line 1 : The first @EditCheck:CheckName line is a tag which links the Test Case back to the Edit Check. These tags tell TrialGrid which Test Cases are related to which Edit Checks. You can also use @Form:FormOID, @CustomFunction:CustomFunctionName and @Derivation:DerivationName to relate a Test Case with a Form, Custom Function and Derivation. A Test Case can be related to several objects.
Line 2: The Test Case will be named after the Edit Check it was created from but the name of the test is not important.
Line 9: This is the start of the first scenario. The Test Case generator will try to create a single test which will make the Edit Check fire. If you want more Test Cases you can simply copy and paste lines 9-17 and change the value settings on lines 12-13. In the case of a date check you may want to test values before, after and on the target date for instance.
Line 19: This is the start of the second scenario. The Test Case generator will try to create a scenario which makes the Check not fire (e.g. dates are in range, not out of range). As before, if you want to have additional negative checks you can copy and paste this section to create more.
Line 29. This is a comment section which includes who created the check, when and from which Edit Check. It also includes the original description of the check. This comment section is not necessary for the scenarios to be run, it is simply documentation.
Running a Test Case
Now that we have a Test Case created we can run it.
Save any changes you have made to the Test Case and then click the "Run" button in the top right. This will create a Test Set which incorporates only this Test Case.
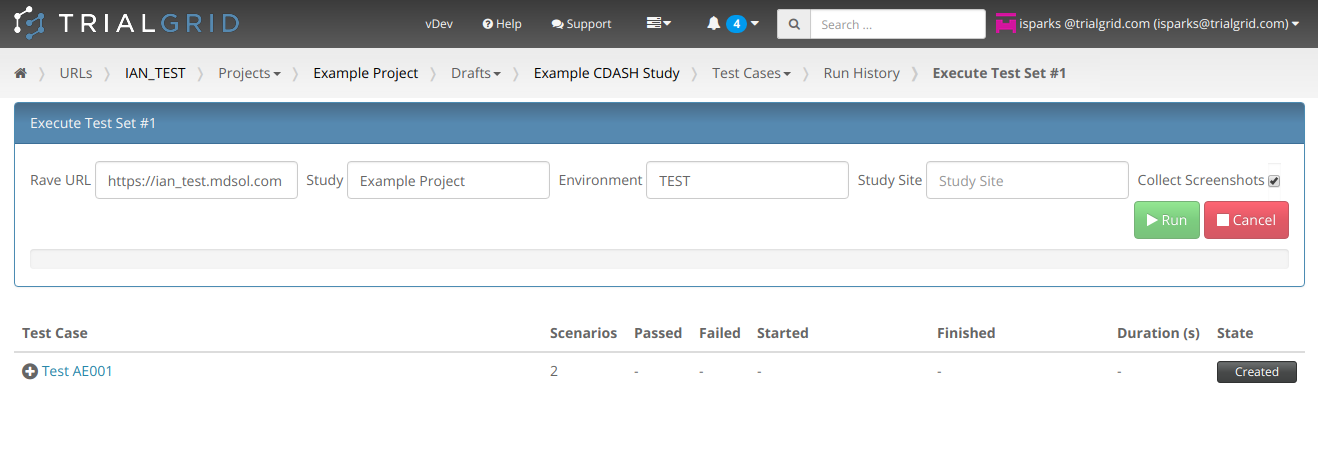
See the next section for running this first Test Set.